When selling jewelry, attaching price tags properly is an essential step in preparing your Jewelry Labels And Tags. Not only do price tags communicate the value of each piece, but they also often contain important information like product codes, materials, and care instructions. Therefore, knowing how to attach these tags to your jewelry in a secure and aesthetically pleasing way is crucial.
Choose the Right Type of Price Tag
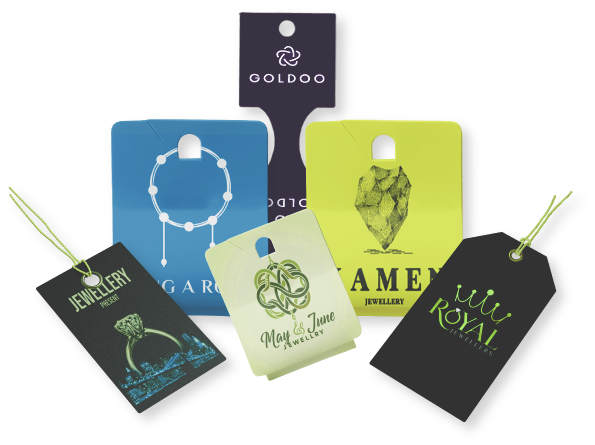
Before attaching price tags to your jewelry labels and tags, it’s important to choose the right type of tag. There are several options available, each suited to different types of jewelry and branding needs.
-
String Tags
String tags are small, often rectangular, tags that come with an attached string or loop. These tags are versatile and can be used on a wide variety of jewelry pieces, including necklaces, bracelets, and rings. The string can be tied around a part of the jewelry, such as a clasp or loop, making it easy to attach and remove.
-
Fold-Over Tags
Fold-over tags, also known as adhesive tags, are typically used for items like rings or earrings. These tags wrap around a part of the jewelry, and the ends stick together, securing the tag in place. Fold-over tags are often chosen for their sleek appearance and ease of use.
-
Barbell Tags
Barbell tags are designed specifically for items like rings and small earrings. These tags have a narrow strip that wraps around the jewelry and attaches to itself with an adhesive. The barbell shape allows the tag to sit flat against the jewelry, providing a neat and tidy look.
-
Lock-On Tags
Lock-on tags are small plastic tags that lock securely onto jewelry labels and tags. They are tamper-evident, meaning that once they are attached, they cannot be removed without cutting the tag. These tags are ideal for high-value items where security is a concern.
-
Sticker Tags
Sticker tags are adhesive labels that stick directly onto the jewelry or its packaging. While they may not be as elegant as other options, they are practical for items that will be placed in display boxes or bags where the tag will not be directly visible.
Prepare the Jewelry
Before attaching the tags, it’s essential to prepare the jewelry labels and tags. This involves cleaning the pieces to ensure that they are free from dust, oils, and other residues that might affect the attachment of the tags. Use a soft cloth or jewelry cleaning solution to gently wipe down each piece. This step not only helps the tags adhere better but also ensures that your jewelry looks its best when displayed.
Gather the Necessary Tools
To attach price tags to jewelry, you’ll need a few basic tools. Having these tools on hand will make the process smoother and more efficient.
-
Tagging Gun or Handheld Labeler
A tagging gun is commonly used for attaching string tags or barbell tags. This tool allows you to quickly and securely attach Jewelry Labels And Tags with minimal effort. If you’re using fold-over or lock-on tags, a handheld label might be more appropriate for applying the adhesive tags.
-
Scissors
Scissors are essential for cutting string or trimming excess material from Jewelry Labels And Tags. They are also useful for removing any existing tags that need to be replaced.
-
Jewelry Pliers
Jewelry pliers can be helpful when working with delicate pieces or when you need to attach tags to hard-to-reach areas. They allow for precise manipulation of small components without damaging the jewelry.
-
Adhesive Remover
If you’re re-tagging items that have previously been tagged, an adhesive remover can help clean off any residue left behind by old tags or stickers. This ensures that your new tags adhere properly and that the jewelry looks clean and professional.
-
A Clean Workspace
Setting up a clean, well-lit workspace is essential for the tagging process. A clutter-free area helps prevent accidents and ensures that you can easily find and handle the tools and jewelry pieces as you work.
Attach the Tags
With your jewelry prepared and your tools ready, it’s time to attach the tags. The method you choose will depend on the type of tag you’re using and the type of jewelry you’re tagging.
-
Attaching String Tags
To attach a string tag, simply loop the string around a part of the jewelry, such as the clasp of a necklace or the loop of an earring. Tie the string securely, but avoid tying it too tightly, as this could damage delicate pieces. If the string is too long, use scissors to trim it to the desired length. Ensure that the tag hangs neatly and doesn’t interfere with the jewelry appearance.
-
Attaching Fold-Over Tags
For fold-over tags, peel off the adhesive backing and wrap the tag around a part of the jewelry, such as the band of a ring or the stem of an earring. Press the adhesive ends together firmly to secure the tag in place. Make sure that the tag is positioned neatly and that it doesn’t obscure any important details of it.
-
Attaching Barbell Tags
To attach a barbell tag, wrap the narrow strip around the jewelry labels and tags and press the adhesive ends together. The tag should sit flat against the jewelry without twisting or bunching. This method is particularly effective for small items like rings, where a secure and unobtrusive tag is needed.
-
Attaching Lock-On Tags
Lock-on tags are attached by inserting the jewelry into the plastic loop of the tag and then locking it in place. These Jewelry Labels And Tags are tamper-evident, providing added security for high-value items. Once the tag is locked, it cannot be removed without cutting it, so ensure that it is positioned correctly before locking it.
-
Attaching Sticker Tags
If you’re using sticker tags, simply peel off the backing and apply the sticker to the jewelry or its packaging. Press down firmly to ensure that the sticker adheres well. Sticker tags are best used on packaging or on flat surfaces where they won’t be disturbed.
Double-Check Your Work
Once all the tags are attached, it’s important to double-check your work. Ensure that each piece of jewelry has the correct tag with accurate pricing and information. Check that the tags are securely attached and that they do not detract from the appearance of the jewelry. If you notice any Jewelry Labels And Tags that are loose or improperly placed, reattach them as needed.
Store or Display the Tagged Jewelry
With the Jewelry Labels And Tags securely attached, you can now store or display your jewelry. If you’re storing the items before display, make sure they are kept in a safe, organized manner. Use trays, pouches, or boxes to prevent the pieces from becoming tangled or damaged. Proper storage ensures that your jewelry remains in pristine condition until it’s time to sell.
Conclusion
Attaching price tags to jewelry labels and tags is a straightforward process that plays a vital role in how your products are presented to customers. By choosing the right type of tag, preparing your jewelry properly, and using the correct tools, you can ensure that your is tagged securely and professionally. Packaging Companies In Canada offer a wide range of services, from eco-friendly materials to bespoke design solutions.